This guide will walk you through how to create an Argyle account, access the Argyle Console, invite your users to connect their payroll accounts, and have them verify their identity, employment, & income.
Congrats on a good decision! Your team will thank you later. If you’ve been sent this page, it means you are about to start your pilot with Argyle, and you will soon be receiving insightful information about your users that will help you make better decisions. If you’ve stumbled on this page and are not about to start your pilot, here’s a peek at what you can expect from Argyle’s simple onboarding and rich data access.
If you have any questions or would like to start using Argyle, please reach out to your point of contact on the Argyle team or email questions@argyle.com. Please note: Google Chrome is the recommended internet browser for optimal experience for the Argyle Console.
Here are the steps to get you going
1. Create your Argyle Account
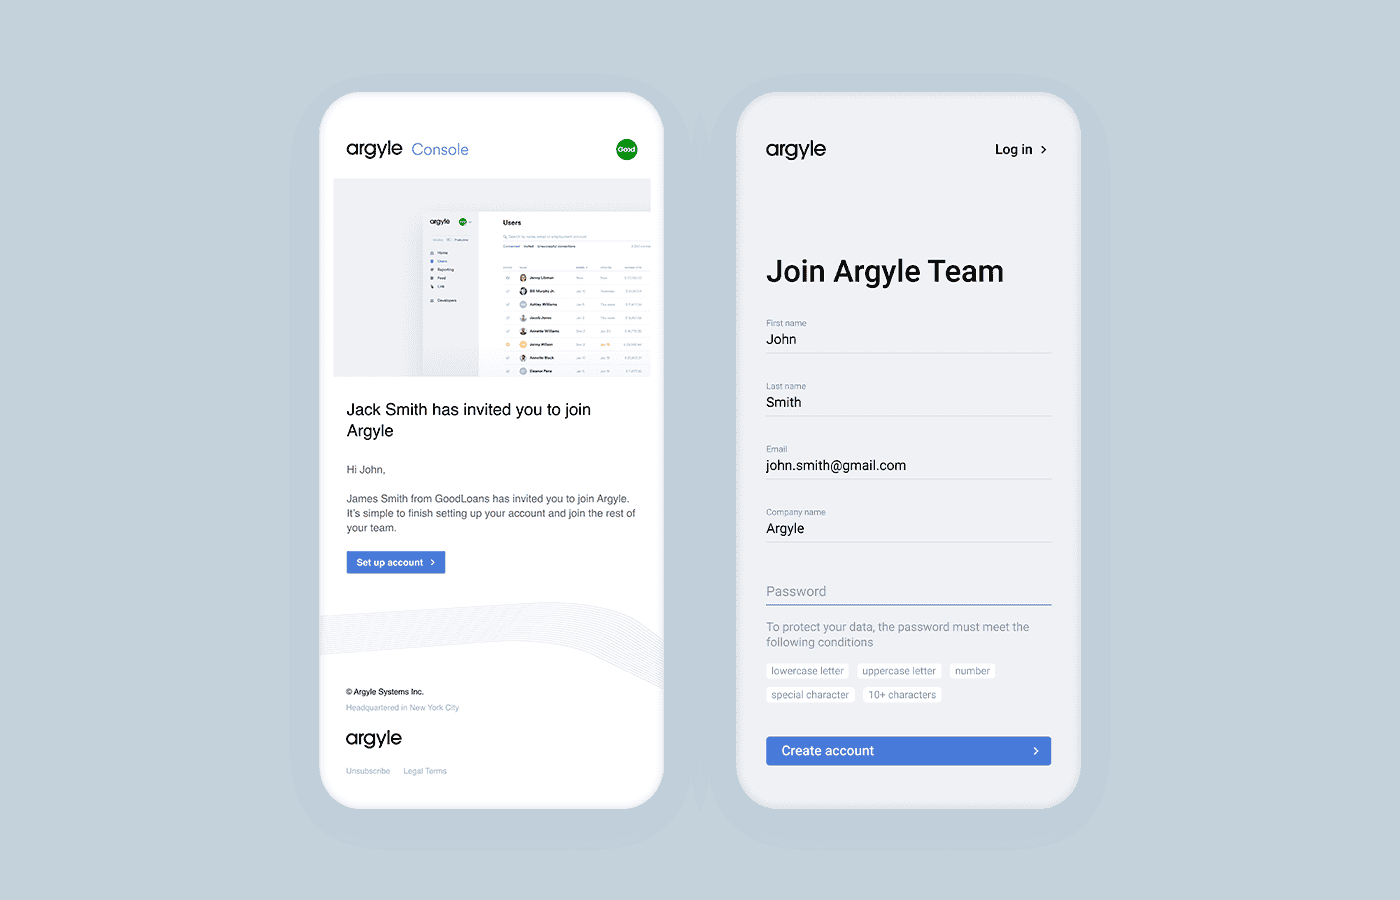
Ask your contact on the Argyle Growth team (or one of your team members who already has access) to send you an invite to create an Argyle account. After receiving an invitation to join Argyle, set up your account with your work email address and a password. Now you can log into Argyle Console with your new account credentials.
2. Navigate to the Data Viewer & enable Production Mode
Once you’ve created your Argyle account, log into the Argyle Console. On the left-hand side of the interface, you should see a menu of options. Click on the “Data Viewer” option to be able to start interacting with your users.
Additionally, confirm that you are in Production Mode by ensuring the Sandbox Mode toggle is turned off on the bottom left-hand side.
3. Invite Users to Connect with Argyle
Within the Data Viewer tab, you should see an option to “Invite via Email” or, if you’ve already connected a few accounts, a “Connect a User” option. Here, you can invite a user by typing in their email address and/or phone number, their full name, and customize the text in the invite. The screens below show the process for both you and the user you’ve invited.
Internal Operations Process
Connect a user by inputting their email address and/or their phone number and their full name. You can also update the invitation text the user will see.
User Process (what your customers will see)
Users will receive an email and/or SMS prompting them to connect their payroll account with an embedded link. They can follow this link to connect their account via Argyle.
4. Verify Identity, Employment, and Income with the Data Viewer
Once a user has connected their account, you will see them appear in the Data Viewer in full color rather than grayed out. You can then click into the account to view the respective data that they’ve offered permission for you to access.
There are lots of ways to verify your users with Argyle data – here are a few options and where you can find the information you need in the Data Viewer. While using Argyle’s no-code solution, you can securely document the information for your records.
Verify Identity and Employment
Argyle provides a number of data fields to support identity verification, including name, address, email, phone number, SSN, and birthdate. This data is stored under the “Profile” tab within an account. Name, address, email, phone number, and birthdate are clearly shown when you click into the “Profile” tab. To access more sensitive information, like SSN, click on the “JSON” button in the upper right hand corner of the “Profile” tab.
You can underwrite employment status using the Data Viewer. Again, this information is stored under the “Profile” tab within an account and can be accessed by clicking the “JSON” button in the upper right-hand corner of the “Profile” tab. Here, you can find employer name, employment status, employment type (i.e. hourly or salaried), job title, and hire date.
Verify Income
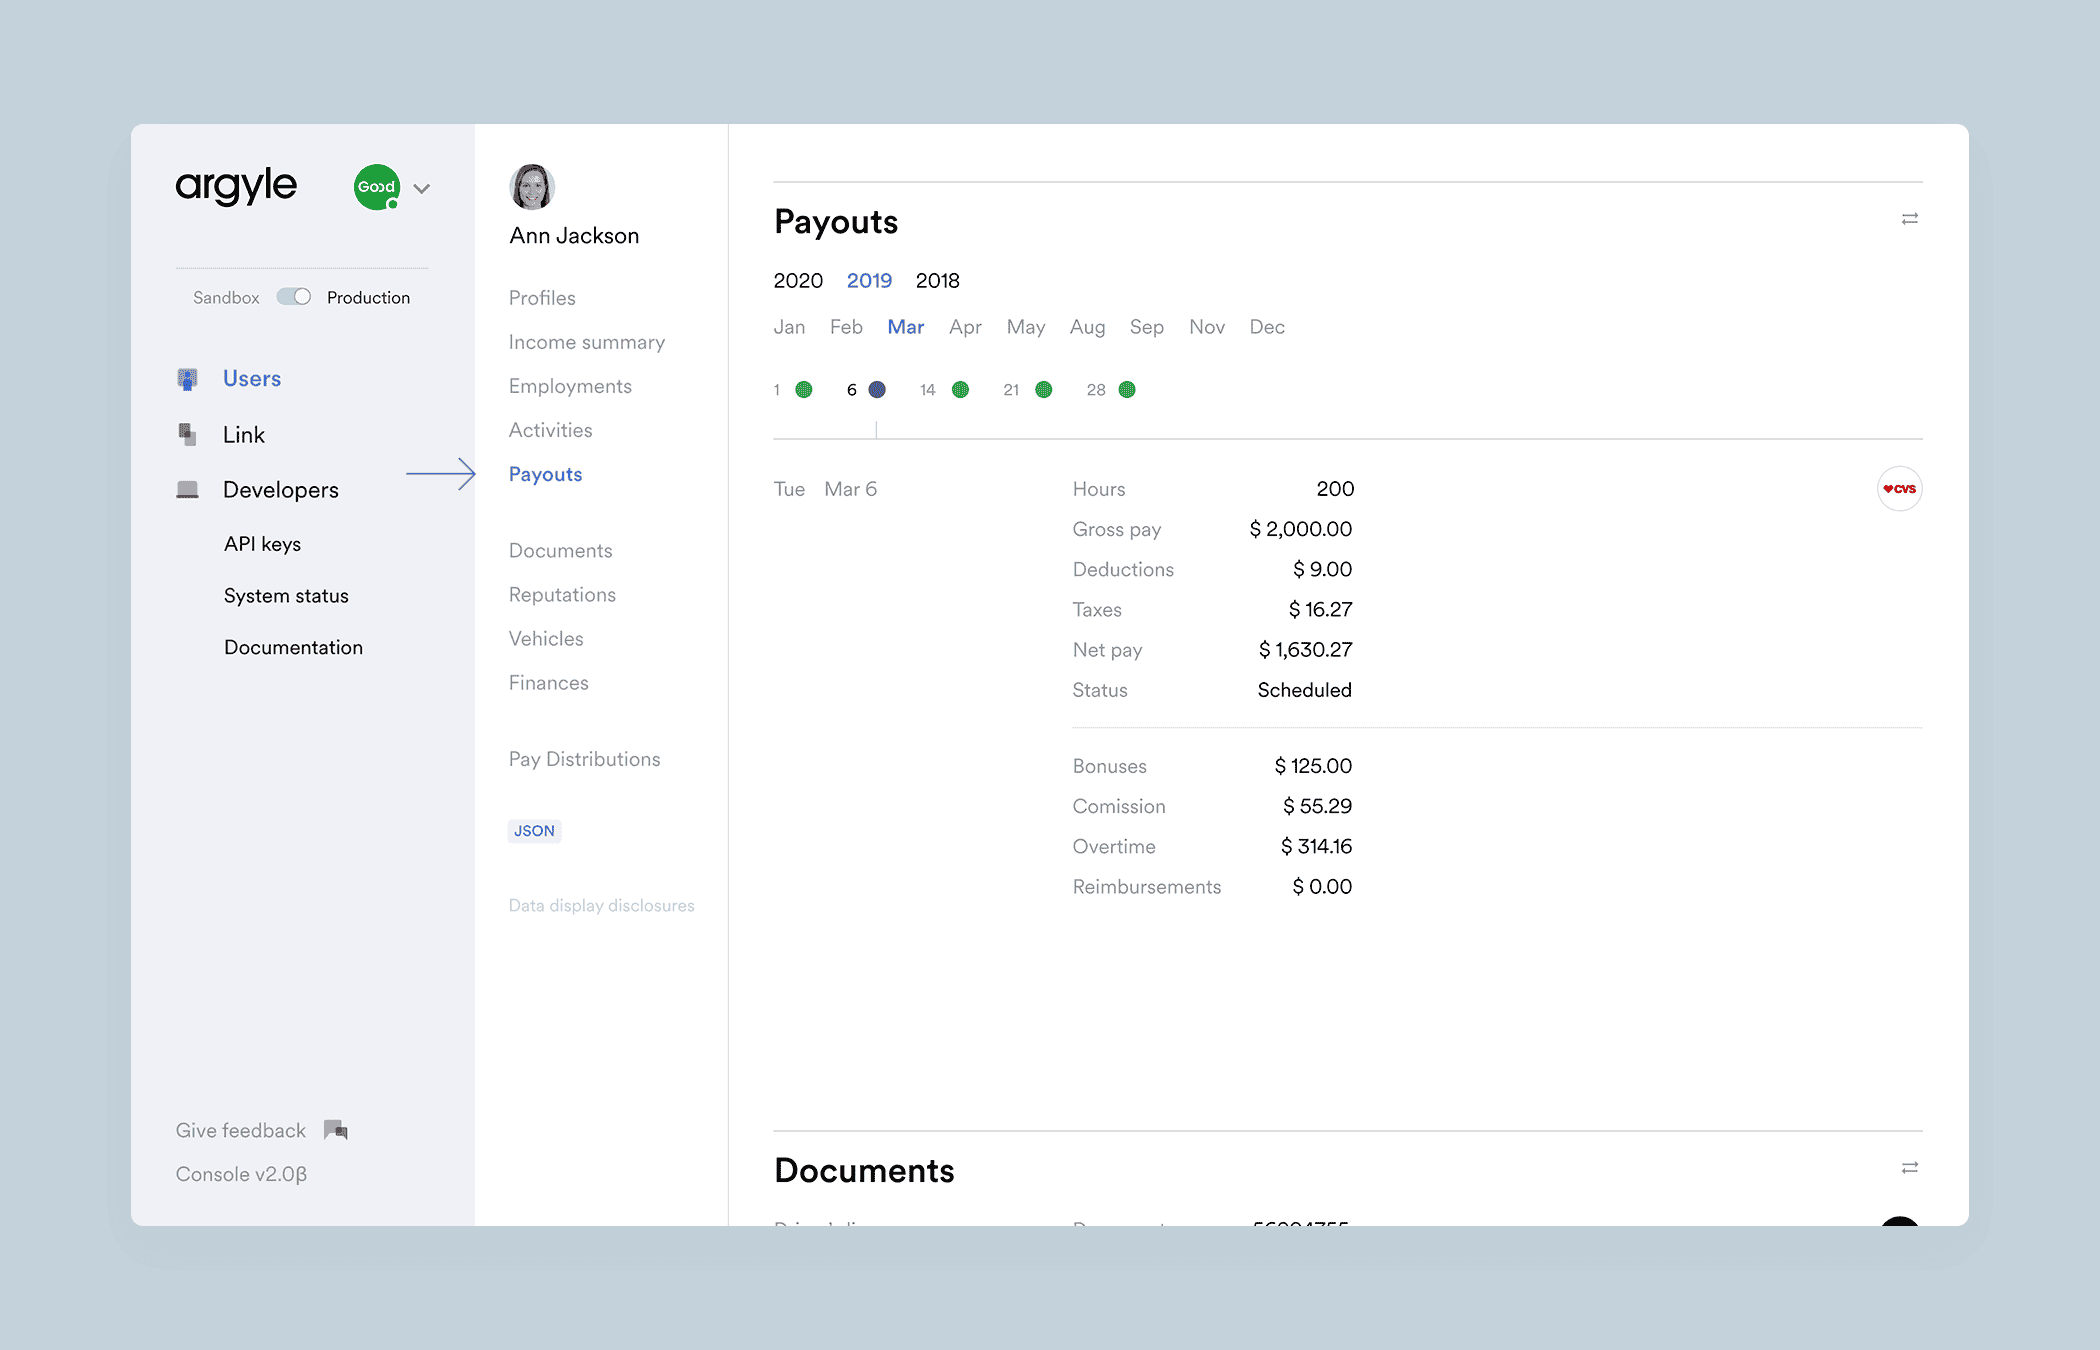
Income data can be found under the “Payouts” tab in the Data Viewer. Here you can find data on each individual payout a user has received and their total monthly and annual income, including historical months and years when available in the payroll system. You can view the breakout of gross income, taxes, deductions, and net income.
Verify Bank Account(s)
You can confirm the bank account(s) where a user is receiving their direct deposit, as well as any allocation split between different accounts. This data is found within the “Payouts Distribution” tab within the Data Viewer under the “Profile” tab.
Start connecting your first account today! And as always, please reach out to questions@argyle.com if you have, well, questions. We’re always here to help.
